mNo edit summary Tag: sourceedit |
No edit summary Tag: Visual edit |
||
| (6 intermediate revisions by 4 users not shown) | |||
| Line 1: | Line 1: | ||
| − | [[File:Rdr sharpshooter challenge.jpg| |
+ | [[File:Rdr sharpshooter challenge.jpg|200px|border|left]] |
| − | [[File:Sharpshooter-Emblem.png| |
+ | [[File:Sharpshooter-Emblem.png|90px|right]] |
{{clear}} |
{{clear}} |
||
:''For the Multiplayer version of this challenge, see [[Sharpshooter Challenges (Multiplayer)]].'' |
:''For the Multiplayer version of this challenge, see [[Sharpshooter Challenges (Multiplayer)]].'' |
||
The '''Sharpshooter Challenges''' involve shooting many difficult-to-hit targets. |
The '''Sharpshooter Challenges''' involve shooting many difficult-to-hit targets. |
||
| − | ==Challenges== |
+ | == Challenges == |
| − | + | *Rank 1: Kill any 5 flying birds |
|
| ⚫ | |||
| ⚫ | |||
| + | *Rank 4: Kill 5 birds from a moving train |
||
| ⚫ | |||
| ⚫ | |||
| ⚫ | |||
| + | *Rank 8: Shoot the hats off of 2 people's heads and disarm 2 people |
||
| ⚫ | |||
| ⚫ | |||
| + | |||
| + | == Rank 1 == |
||
| + | :''Kill any 5 flying birds'' |
||
| + | |||
The five [[Birds in Redemption|birds]] for this challenge can be any combination of [[crow]]s, [[duck]]s, [[eagle]]s, [[hawk]]s, [[seagull]]s, [[songbird]]s, or [[vulture]]s. They do not have to be shot at the same time, but they must be in flight for the counter to register. |
The five [[Birds in Redemption|birds]] for this challenge can be any combination of [[crow]]s, [[duck]]s, [[eagle]]s, [[hawk]]s, [[seagull]]s, [[songbird]]s, or [[vulture]]s. They do not have to be shot at the same time, but they must be in flight for the counter to register. |
||
After completing the Twin Rocks gang hideout, there will always be more than 5 vultures circling overhead. |
After completing the Twin Rocks gang hideout, there will always be more than 5 vultures circling overhead. |
||
| + | == Rank 2 == |
||
| + | :''Kill 5 rabbits'' |
||
| ⚫ | |||
[[Rabbit]]s are found in small groups all over the map, but seem to stick to grassy plains and are typically found near a road. Areas like [[The Hanging Rock]] and [[Warthington Ranch]] usually have rabbits in small groups from 8:30 AM until noon. |
[[Rabbit]]s are found in small groups all over the map, but seem to stick to grassy plains and are typically found near a road. Areas like [[The Hanging Rock]] and [[Warthington Ranch]] usually have rabbits in small groups from 8:30 AM until noon. |
||
Crouch and use [[Dead Eye Targeting|Dead Eye]] to take down small groups of them. Running or riding a [[horse]] makes noise and causes the rabbits to run away before they can be seen or killed. |
Crouch and use [[Dead Eye Targeting|Dead Eye]] to take down small groups of them. Running or riding a [[horse]] makes noise and causes the rabbits to run away before they can be seen or killed. |
||
These can be found at the [[Warthington Ranch]], south of [[MacFarlane's Ranch]]. High-power weapons may obliterate the rabbits, leaving no carcass to skin. Use revolvers or repeaters instead. |
These can be found at the [[Warthington Ranch]], south of [[MacFarlane's Ranch]]. High-power weapons may obliterate the rabbits, leaving no carcass to skin. Use revolvers or repeaters instead. |
||
| + | == Rank 3 == |
||
| + | :''Kill 5 coyotes without taking any damage from them'' |
||
| ⚫ | |||
[[Coyote]]s can be found in most areas of [[New Austin]] and [[Nuevo Paraiso]]. They are more common at night and can be located by their distinctive sound, a very high-pitched howl. |
[[Coyote]]s can be found in most areas of [[New Austin]] and [[Nuevo Paraiso]]. They are more common at night and can be located by their distinctive sound, a very high-pitched howl. |
||
| Line 26: | Line 41: | ||
| − | + | == Rank 4 == |
|
| + | :''Kill 5 birds from a moving train'' |
||
| ⚫ | |||
| + | |||
[[Train]]s are depicted on the map with an icon. Locate and board the train, then use the ladders outside of the cabins to get up top. Avoid moving around too much, in order to decrease the chance of falling off. Alternatively, climb into the tender behind the engineer, a more secure location. |
[[Train]]s are depicted on the map with an icon. Locate and board the train, then use the ladders outside of the cabins to get up top. Avoid moving around too much, in order to decrease the chance of falling off. Alternatively, climb into the tender behind the engineer, a more secure location. |
||
| Line 34: | Line 50: | ||
Sometimes this challenge can only be completed when a train is boarded at a station, as opposed to being boarded from horseback. |
Sometimes this challenge can only be completed when a train is boarded at a station, as opposed to being boarded from horseback. |
||
| + | == Rank 5 == |
||
| ⚫ | |||
| + | :''Kill any 2 different types of wild animals in 1 Dead Eye meter'' |
||
This challenge can be done any time two different types of wild [[animals]] are in range. Simple approaches include finding an animal of one type and waiting near or following it until you see another animal of a different type. |
This challenge can be done any time two different types of wild [[animals]] are in range. Simple approaches include finding an animal of one type and waiting near or following it until you see another animal of a different type. |
||
| Line 43: | Line 60: | ||
Canceling the Dead-eye after killing the two animals does not work. The Dead-eye must end automatically for it to count. |
Canceling the Dead-eye after killing the two animals does not work. The Dead-eye must end automatically for it to count. |
||
| − | + | == Rank 6 == |
|
| + | :''Shoot 2 hats off 2 different people's heads'' |
||
| + | |||
The player can use precise aim to shoot the hat off a NPC's head. Shoot the hats off a total of two different NPC's to complete this challenge. These do not have to be done at the same time. |
The player can use precise aim to shoot the hat off a NPC's head. Shoot the hats off a total of two different NPC's to complete this challenge. These do not have to be done at the same time. |
||
Characters with larger hats are more convenient targets. For example, [[Walton's Gang]] wears top hats and [[Banditos]] wear sombreros, both of which provide generous area to target. Piano players in Armadillo and Blackwater and some stagecoach drivers have tall hats that can be shot off with the use of Dead Eye while they are distracted with playing the piano. |
Characters with larger hats are more convenient targets. For example, [[Walton's Gang]] wears top hats and [[Banditos]] wear sombreros, both of which provide generous area to target. Piano players in Armadillo and Blackwater and some stagecoach drivers have tall hats that can be shot off with the use of Dead Eye while they are distracted with playing the piano. |
||
| − | Use the Dead Eye mode that [[Landon Ricketts]] taught about: simple Level 1 Slow Motion. Do not use Dead Eye Lock-on or it'll be head-shot, not a hat-shot. Once in slow motion, manually aim for the very top of the hat or rim and shoot. It is |
+ | Use the Dead Eye mode that [[Landon Ricketts]] taught about: simple Level 1 Slow Motion. Do not use Dead Eye Lock-on or it'll be head-shot, not a hat-shot. Once in slow motion, manually aim for the very top of the hat or rim and shoot. It is possible, but VERY difficult, to use Level 2 Dead Eye because of the auto-paint feature. |
NPC's sometimes react aggressively when their hat is shot off, so it may be advisable to use the [[Bandana]] and plan an escape route. |
NPC's sometimes react aggressively when their hat is shot off, so it may be advisable to use the [[Bandana]] and plan an escape route. |
||
| Line 54: | Line 73: | ||
Another area to obtain this is [[Thieves' Landing]], as there is no Law Enforcement there. Many of the people, who end up shooting back, wear cowboy hats or top hats. |
Another area to obtain this is [[Thieves' Landing]], as there is no Law Enforcement there. Many of the people, who end up shooting back, wear cowboy hats or top hats. |
||
| + | If you are playing the honorable mode, it is recommended to wear a [[Bandana]], just in case you accidentally kill somebody. |
||
| ⚫ | |||
| + | |||
| + | == Rank 7 == |
||
| + | :''Kill 3 bears each with 1 shot'' |
||
| + | |||
[[Bear]]s are found in [[Tall Trees]]. One shot to the head with a high-power weapon such as the [[Buffalo Rifle]], [[Bolt Action Rifle]], [[Springfield Rifle]], or any sniper rifle will make the kill. Bears typically give you a little time before attacking so Dead Eye may not be necessary, but may be helpful. |
[[Bear]]s are found in [[Tall Trees]]. One shot to the head with a high-power weapon such as the [[Buffalo Rifle]], [[Bolt Action Rifle]], [[Springfield Rifle]], or any sniper rifle will make the kill. Bears typically give you a little time before attacking so Dead Eye may not be necessary, but may be helpful. |
||
| Line 63: | Line 86: | ||
Another, much safer technique is to get a stagecoach or a cart with one horse and ride it off the road to Tall Trees. Bears cannot attack while the player is driving and will simply ignore them or run away, at which point they can be shot. |
Another, much safer technique is to get a stagecoach or a cart with one horse and ride it off the road to Tall Trees. Bears cannot attack while the player is driving and will simply ignore them or run away, at which point they can be shot. |
||
| + | Between the eyes is the perfect spot. |
||
| ⚫ | |||
| + | |||
| + | == Rank 8 == |
||
| + | :''Shoot the hats off of 2 people's heads and disarm 2 people'' |
||
| + | |||
This challenge is a repeat of Rank 6 with the addition of two [[disarm]]s. These do not have to be done at the same time. Make sure the player aims at the weapon (not arm or hand). If blood is drawn, it doesn't count. Enemies carrying rifles or shotguns can make targeting less difficult because of the size of the weapons. |
This challenge is a repeat of Rank 6 with the addition of two [[disarm]]s. These do not have to be done at the same time. Make sure the player aims at the weapon (not arm or hand). If blood is drawn, it doesn't count. Enemies carrying rifles or shotguns can make targeting less difficult because of the size of the weapons. |
||
| Line 72: | Line 99: | ||
Completing this challenge while clearing a hideout, can set up a fast finish for the next challenge, because vultures will spawn over head. |
Completing this challenge while clearing a hideout, can set up a fast finish for the next challenge, because vultures will spawn over head. |
||
| + | == Rank 9 == |
||
| ⚫ | |||
| + | :''Kill any 6 wild animals without reloading or changing weapons'' |
||
| + | |||
This challenge can be done anywhere that six or more wild animals appear together. Flocks of birds make convenient targets, including both random spawns and the [[vulture]]s that circle over cleared gang [[hideouts]]. |
This challenge can be done anywhere that six or more wild animals appear together. Flocks of birds make convenient targets, including both random spawns and the [[vulture]]s that circle over cleared gang [[hideouts]]. |
||
| Line 79: | Line 108: | ||
Going into and out of Dead Eye will automatically reload a gun without counting against this challenge. |
Going into and out of Dead Eye will automatically reload a gun without counting against this challenge. |
||
| + | == Rank 10 == |
||
| ⚫ | |||
| + | :''Disarm any 6 enemies without reloading or changing weapons'' |
||
Weapons with high ammo capacity, such as the [[Mauser Pistol]], [[Henry Repeater]], or [[Evans Repeater]] can make this challenge less difficult. The player also needs a sufficient supply of weapon-carrying enemies, so gang [[hideouts]], [[saloon]] fights and other standoff situations are convenient. Disguises like the gang [[outfits]] can also help you get close to groups of enemies. |
Weapons with high ammo capacity, such as the [[Mauser Pistol]], [[Henry Repeater]], or [[Evans Repeater]] can make this challenge less difficult. The player also needs a sufficient supply of weapon-carrying enemies, so gang [[hideouts]], [[saloon]] fights and other standoff situations are convenient. Disguises like the gang [[outfits]] can also help you get close to groups of enemies. |
||
| Line 86: | Line 116: | ||
Leaving and then re-entering Dead Eye reloads ammo, but does not count against this challenge. |
Leaving and then re-entering Dead Eye reloads ammo, but does not count against this challenge. |
||
| − | + | === Tips === |
|
*At the [[Chuparosa]] jail, climb the stairs and ladders to the room at the top of the building, then open the chest of drawers. This causes the player to become wanted. The Mexican lawmen will will attempt to enter the room by climbing the ladder, so get into position at the opposite end of the room, with a weapon that has a large capacity, and wait for them to climb up through the floor. When they get to the top of the ladder, they will draw their weapon. Enter Dead Eye and disarm them; players may need to do this more than once for each enemy. Do not release the aim button and simply wait for the next one before shooting him in the same way. The player might need to exercise a bit of patience, as waiting for the next lawman to locate. |
*At the [[Chuparosa]] jail, climb the stairs and ladders to the room at the top of the building, then open the chest of drawers. This causes the player to become wanted. The Mexican lawmen will will attempt to enter the room by climbing the ladder, so get into position at the opposite end of the room, with a weapon that has a large capacity, and wait for them to climb up through the floor. When they get to the top of the ladder, they will draw their weapon. Enter Dead Eye and disarm them; players may need to do this more than once for each enemy. Do not release the aim button and simply wait for the next one before shooting him in the same way. The player might need to exercise a bit of patience, as waiting for the next lawman to locate. |
||
| Line 101: | Line 131: | ||
*[[Casa Madrugada]] is also a good place to earn this rank. At daytime, it is much lighter than in Thieves Landing and due to being smaller, there are less angry enemies surrounding Marston. As each person usually pulls out 2-3 weapons before dying, The challenge can be done with only a few armed civilians. |
*[[Casa Madrugada]] is also a good place to earn this rank. At daytime, it is much lighter than in Thieves Landing and due to being smaller, there are less angry enemies surrounding Marston. As each person usually pulls out 2-3 weapons before dying, The challenge can be done with only a few armed civilians. |
||
| − | == External Links == |
||
| ⚫ | |||
| ⚫ | |||
| − | ==Rewards== |
+ | == Rewards == |
:''Congratulations. You are now a Legendary Sharpshooter. Your Dead Eye will now build faster from shooting targets.'' |
:''Congratulations. You are now a Legendary Sharpshooter. Your Dead Eye will now build faster from shooting targets.'' |
||
| − | After |
+ | After Rank 5, the player receives an increase in ammo when using chests in safehouses and camps. Once players reach Rank 10, the player's Dead Eye meter builds up faster as he kills enemies. |
Becoming a Legendary Sharpshooter (Rank 10) is a prerequisite for the [[Legend of the West Outfit]] and the [[Bureau Uniform]]. |
Becoming a Legendary Sharpshooter (Rank 10) is a prerequisite for the [[Legend of the West Outfit]] and the [[Bureau Uniform]]. |
||
| + | |||
| + | == Gallery == |
||
| ⚫ | |||
| + | |||
| + | == Videos == |
||
| ⚫ | |||
| ⚫ | |||
==Trophies/Achievements== |
==Trophies/Achievements== |
||
| Line 132: | Line 166: | ||
{{100% Completion}} |
{{100% Completion}} |
||
{{RDR}} |
{{RDR}} |
||
| + | [[de:Scharfschützen-Herausforderungen]] |
||
[[Category:Activities]] |
[[Category:Activities]] |
||
[[Category:Challenges]] |
[[Category:Challenges]] |
||
Revision as of 08:58, 13 June 2020
- For the Multiplayer version of this challenge, see Sharpshooter Challenges (Multiplayer).
The Sharpshooter Challenges involve shooting many difficult-to-hit targets.
Challenges
- Rank 1: Kill any 5 flying birds
- Rank 2: Kill 5 rabbits
- Rank 3: Kill 5 coyotes without taking any damage from them
- Rank 4: Kill 5 birds from a moving train
- Rank 5: Kill any 2 different types of wild animals in 1 Dead Eye meter
- Rank 6: Shoot 2 hats off 2 different people's heads
- Rank 7: Kill 3 bears each with 1 shot
- Rank 8: Shoot the hats off of 2 people's heads and disarm 2 people
- Rank 9: Kill any 6 wild animals without reloading or changing weapons
- Rank 10: Disarm any 6 enemies without reloading or changing weapons
Rank 1
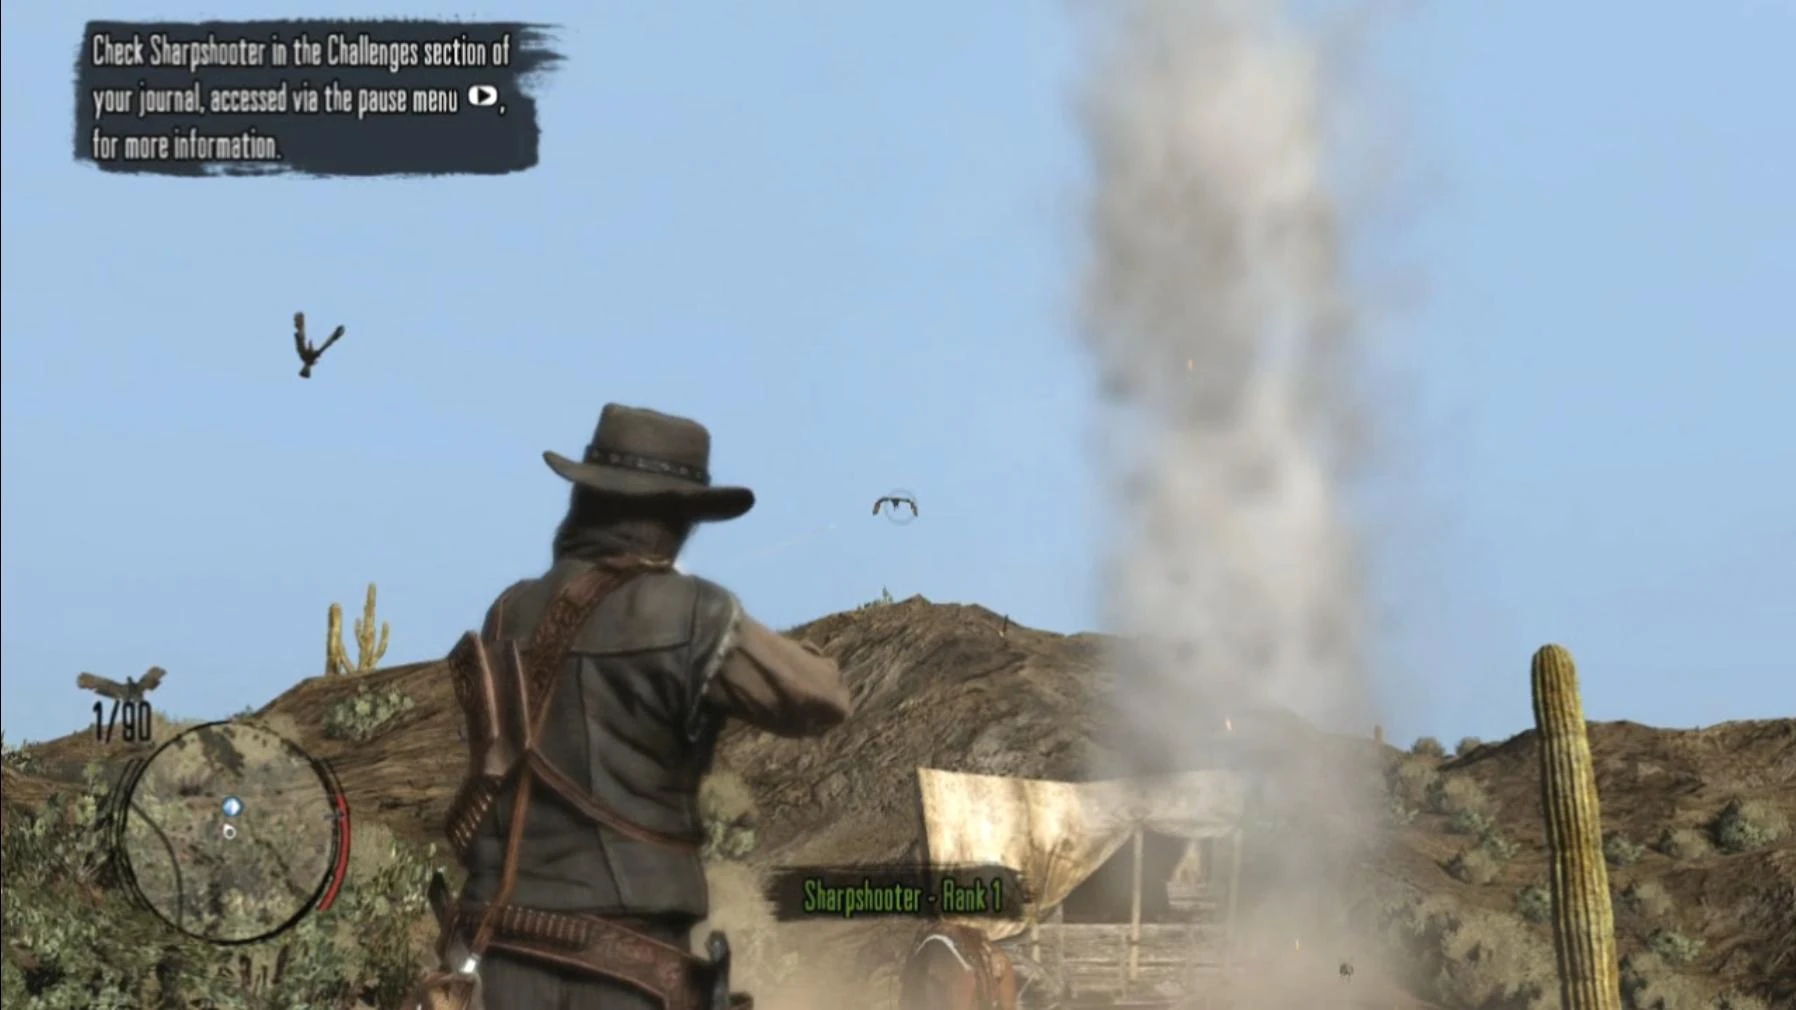
- Kill any 5 flying birds
The five birds for this challenge can be any combination of crows, ducks, eagles, hawks, seagulls, songbirds, or vultures. They do not have to be shot at the same time, but they must be in flight for the counter to register.
After completing the Twin Rocks gang hideout, there will always be more than 5 vultures circling overhead.
Rank 2
- Kill 5 rabbits
Rabbits are found in small groups all over the map, but seem to stick to grassy plains and are typically found near a road. Areas like The Hanging Rock and Warthington Ranch usually have rabbits in small groups from 8:30 AM until noon. Crouch and use Dead Eye to take down small groups of them. Running or riding a horse makes noise and causes the rabbits to run away before they can be seen or killed. These can be found at the Warthington Ranch, south of MacFarlane's Ranch. High-power weapons may obliterate the rabbits, leaving no carcass to skin. Use revolvers or repeaters instead.
Rank 3
- Kill 5 coyotes without taking any damage from them
Coyotes can be found in most areas of New Austin and Nuevo Paraiso. They are more common at night and can be located by their distinctive sound, a very high-pitched howl.
One way to complete this is to use a horse with high stamina and shoot them with single-projectile weapons such as rifles and pistols. Dead Eye and headshots will make short work of them.
If you have difficulty avoiding damage from the coyotes, go to areas of low coyote spawns such as MacFarlane's Ranch. Coyotes will only attack in groups of four or more, so coyotes will be less likely to attack. However, Coyotes fear the sound of gunfire and will often run instead of attacking, unlike wolves who do the opposite.
Rank 4
- Kill 5 birds from a moving train
Trains are depicted on the map with an icon. Locate and board the train, then use the ladders outside of the cabins to get up top. Avoid moving around too much, in order to decrease the chance of falling off. Alternatively, climb into the tender behind the engineer, a more secure location.
As with Rank 1, Repeater Rifles and Dead Eye work well against birds.
Sometimes this challenge can only be completed when a train is boarded at a station, as opposed to being boarded from horseback.
Rank 5
- Kill any 2 different types of wild animals in 1 Dead Eye meter
This challenge can be done any time two different types of wild animals are in range. Simple approaches include finding an animal of one type and waiting near or following it until you see another animal of a different type.
Rattlesnakes don't tend to move and are convenient to use as the first animal. Birds are also in view much of the time and are convenient targets as well. While they are difficult to identify from the ground, they often appear in mixed groups, satisfying the requirement of two different types.
The animals must be wild. Killing domestic animals such as the player's horse doesn't count.
Canceling the Dead-eye after killing the two animals does not work. The Dead-eye must end automatically for it to count.
Rank 6
- Shoot 2 hats off 2 different people's heads
The player can use precise aim to shoot the hat off a NPC's head. Shoot the hats off a total of two different NPC's to complete this challenge. These do not have to be done at the same time.
Characters with larger hats are more convenient targets. For example, Walton's Gang wears top hats and Banditos wear sombreros, both of which provide generous area to target. Piano players in Armadillo and Blackwater and some stagecoach drivers have tall hats that can be shot off with the use of Dead Eye while they are distracted with playing the piano.
Use the Dead Eye mode that Landon Ricketts taught about: simple Level 1 Slow Motion. Do not use Dead Eye Lock-on or it'll be head-shot, not a hat-shot. Once in slow motion, manually aim for the very top of the hat or rim and shoot. It is possible, but VERY difficult, to use Level 2 Dead Eye because of the auto-paint feature.
NPC's sometimes react aggressively when their hat is shot off, so it may be advisable to use the Bandana and plan an escape route.
Another area to obtain this is Thieves' Landing, as there is no Law Enforcement there. Many of the people, who end up shooting back, wear cowboy hats or top hats.
If you are playing the honorable mode, it is recommended to wear a Bandana, just in case you accidentally kill somebody.
Rank 7
- Kill 3 bears each with 1 shot
Bears are found in Tall Trees. One shot to the head with a high-power weapon such as the Buffalo Rifle, Bolt Action Rifle, Springfield Rifle, or any sniper rifle will make the kill. Bears typically give you a little time before attacking so Dead Eye may not be necessary, but may be helpful.
Shotguns will not count for this challenge, as each pellet is counted as a different shot. Also, the kills do not register if the Explosive Rifle is used.
Bears are very powerful and can kill a horse and character very quickly, so it is advisable to have medicine on hand.
Another, much safer technique is to get a stagecoach or a cart with one horse and ride it off the road to Tall Trees. Bears cannot attack while the player is driving and will simply ignore them or run away, at which point they can be shot.
Between the eyes is the perfect spot.
Rank 8
- Shoot the hats off of 2 people's heads and disarm 2 people
This challenge is a repeat of Rank 6 with the addition of two disarms. These do not have to be done at the same time. Make sure the player aims at the weapon (not arm or hand). If blood is drawn, it doesn't count. Enemies carrying rifles or shotguns can make targeting less difficult because of the size of the weapons.
Walton's Gang, found at Armadillo and Twin Rocks, is ideal for this challenge because of their top hats and weaponry. Also, characters at Thieves' Landing tend to carry weapons and will draw them when their hats are shot, providing an opportunity for the disarm. If done fast enough it may be possible to do both in one Dead Eye charge but it's recommended to take some Chewing Tobacco just in case.
Disarms performed during a duel will count toward this challenge, but only the actual gun should be targeted and not the arm. When done correctly, Marston will fire one shot at the gun, drawing no blood and disarming the foe (along with gaining fame and honor). However, Lawmen do not count toward the challenge (Mexican army does, though).
Completing this challenge while clearing a hideout, can set up a fast finish for the next challenge, because vultures will spawn over head.
Rank 9
- Kill any 6 wild animals without reloading or changing weapons
This challenge can be done anywhere that six or more wild animals appear together. Flocks of birds make convenient targets, including both random spawns and the vultures that circle over cleared gang hideouts.
Herds of buffalo or deer, and packs of wolves and coyotes also work well.
Going into and out of Dead Eye will automatically reload a gun without counting against this challenge.
Rank 10
- Disarm any 6 enemies without reloading or changing weapons
Weapons with high ammo capacity, such as the Mauser Pistol, Henry Repeater, or Evans Repeater can make this challenge less difficult. The player also needs a sufficient supply of weapon-carrying enemies, so gang hideouts, saloon fights and other standoff situations are convenient. Disguises like the gang outfits can also help you get close to groups of enemies.
Use Dead Eye to target their weapons and disarm the enemies. The disarms need to be in the same reloading, but do not have to be consecutive. So if you accidentally miss a shot, it doesn't count against you. Also, it counts if you disarm the same person multiple times.
Leaving and then re-entering Dead Eye reloads ammo, but does not count against this challenge.
Tips
- At the Chuparosa jail, climb the stairs and ladders to the room at the top of the building, then open the chest of drawers. This causes the player to become wanted. The Mexican lawmen will will attempt to enter the room by climbing the ladder, so get into position at the opposite end of the room, with a weapon that has a large capacity, and wait for them to climb up through the floor. When they get to the top of the ladder, they will draw their weapon. Enter Dead Eye and disarm them; players may need to do this more than once for each enemy. Do not release the aim button and simply wait for the next one before shooting him in the same way. The player might need to exercise a bit of patience, as waiting for the next lawman to locate.
- Another option is Blackwater. In the south east of Blackwater, and south of the general store there is a red brick building with a black ladder leading up to the roof that is next to a small unfinished wood frame shed. Climb to the roof of the red brick building and use the Evans Repeater to shoot a cop and become wanted. Stand or crouch in the middle of the roof of the red brick building so as not to get shot from surrounding areas on the ground or buildings close by. Just wait for each cop to climb up one at a time and when he stands up, shoot the pistol using Dead Eye while it is facing down before he lifts his arm to shoot the player. Make sure the player only shoots the gun and not his hand because for some reason it won't count. Also, do not release the aim button while waiting for the next cop, otherwise the players gun might automatically reload itself . Just hold it the whole time until the player has done it six times to get the official notice on the screen that the player has completed the challenge.
- At Twin Rocks, there's a well on the south side of the area. If hiding behind the wall/fence and luring enemies to the well to hide behind, they tend to expose the right side of their body when hiding. They hide while pointing their pistol to the air away from their body.
- If using the glitch to get under the governor of Mexico's house, get a bounty and shoot the guns out of the army's hands as they stand still.
- If you are doing a bounty hunter mission, just go to the location where the bounty is at, kill all other enemies and hogtie the bounty, put him on your horse and wait for an infinite amount of enemies come to you. Then use a weapon with a good ammo capacity like the Evans Repeater and disarm each enemy and kill him with a headshot afterwards, then wait for a new wave to arrive. Works great!
- In El Presidio, get the attention of the occupants (Mexican Army works best) and go into the highest tower. It is on the top of the hill to the south of the northern entrance. Go up the first ladder and wait in a corner until the authorities find you. As they climb up the top of the ladder they are sitting ducks.
- Casa Madrugada is also a good place to earn this rank. At daytime, it is much lighter than in Thieves Landing and due to being smaller, there are less angry enemies surrounding Marston. As each person usually pulls out 2-3 weapons before dying, The challenge can be done with only a few armed civilians.
Rewards
- Congratulations. You are now a Legendary Sharpshooter. Your Dead Eye will now build faster from shooting targets.
After Rank 5, the player receives an increase in ammo when using chests in safehouses and camps. Once players reach Rank 10, the player's Dead Eye meter builds up faster as he kills enemies.
Becoming a Legendary Sharpshooter (Rank 10) is a prerequisite for the Legend of the West Outfit and the Bureau Uniform.
Gallery
Sharpshooting
Videos
- Red Dead Redemption - Sharpshooter Rank 10 (easiest method)
- Red Dead Redemption Sharpshooter Rank 10
Trophies/Achievements
 |
20
Bronze
Obtain Legendary rank in any Single Player Ambient Challenge.
|
|---|
 |
100
Gold
Attain 100% List in the singleplayer game completion list.
|
|---|
Related Content
| |||||||||||
| |||||||||||||||||||||||||||||